I made a classic grilled cheese using 3 different appliances, and I'm never using an air fryer again
Paige Bennett

- I used a stove, an oven, and an air fryer to make grilled cheese to find the best method.
- The air fryer left me disappointed with a burnt, chewy, and unappealing grilled-cheese sandwich.
I've made many, many grilled-cheese sandwiches in my day, and I always reach for my favorite griddle pan. No matter what type of bread or cheese I decide to use, I've stuck to the classic stove-top method.
But with so many kitchen gadgets out there these days, I couldn't help but wonder: Is there a better way to make grilled cheese?
I decided to test three staple kitchen appliances — the stove, an oven, and an air fryer — by making classic grilled cheeses using white bread, spreadable butter, and American-cheese slices.
Here's how they stacked up.
First I assembled the ingredients for three identical grilled-cheese sandwiches.
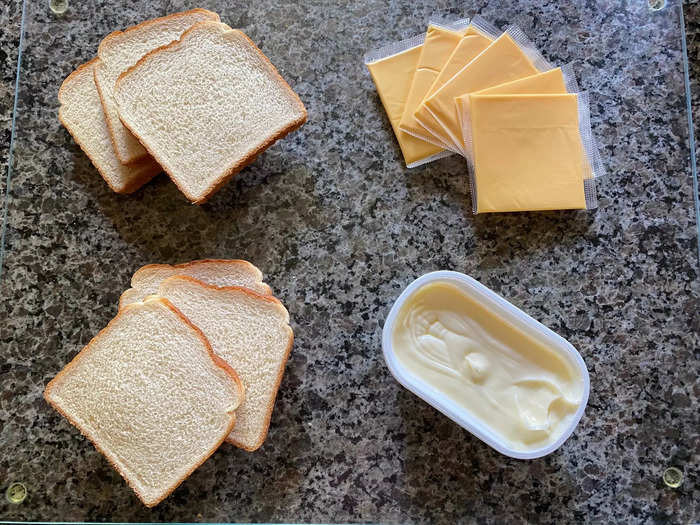
Before I started testing the stove, oven, and air fryer, I decided to assemble my ingredients to make the sandwiches as identical as possible.
For each sandwich, I used two pieces of plain white bread with about 1/4 tablespoon of spreadable butter on one side of each slice. Each sandwich then received two slices of generic American cheese.
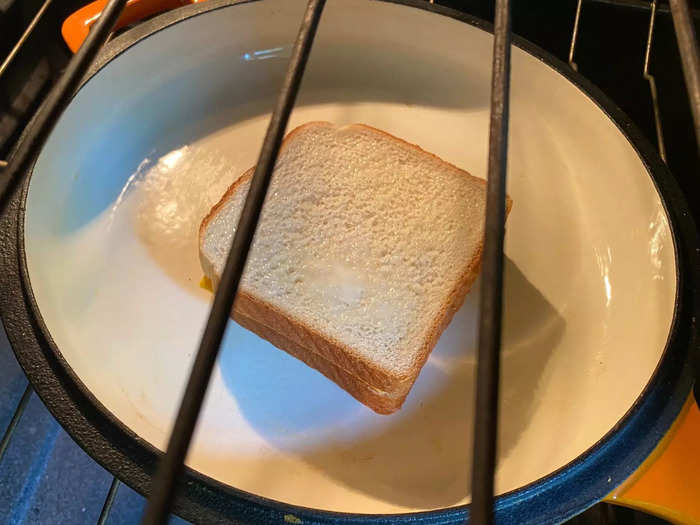
I started with the method I know best: the stove.
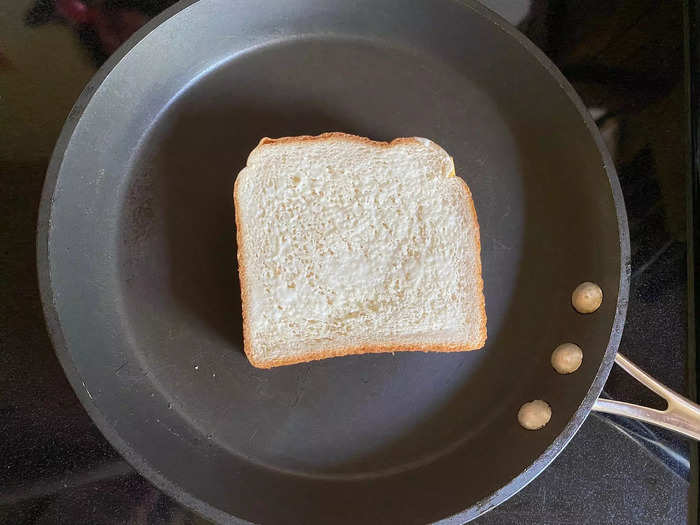
I was using someone else's stove, which was an induction cooktop, and it took a bit longer to heat than my gas stove at home.
I usually set my own stove to medium heat, and the bread starts browning within a few minutes. The induction cooktop took a little longer, about six or seven minutes to heat up and brown one side of the bread.
At this point, I flipped the sandwich and turned the heat up to medium-high.
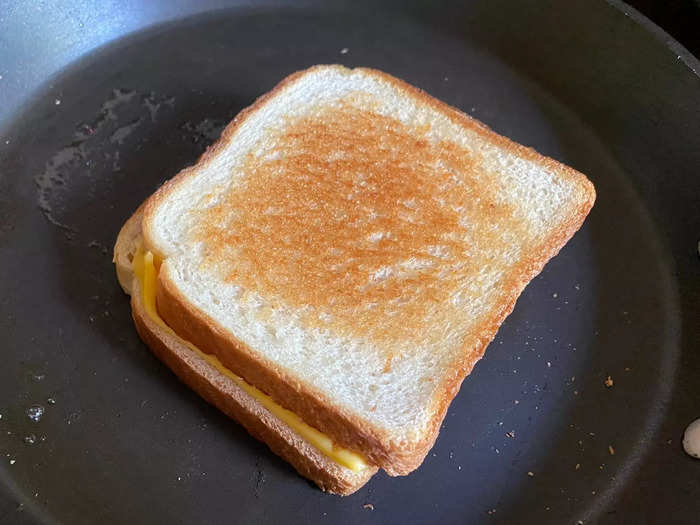
It took only a few minutes to brown the other piece of bread.
Even though controlling the heat was more difficult on the induction cooktop than I'm used to with a gas stove, it was still very easy to keep an eye on the "doneness" of the sandwich.
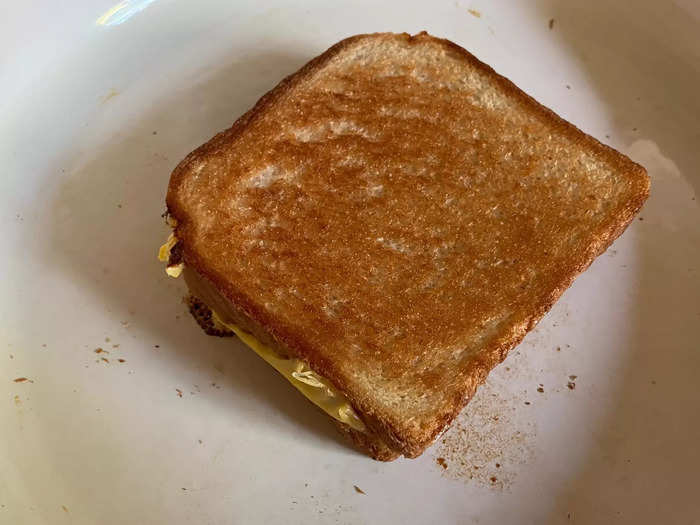
This grilled cheese turned out just as I expected — golden, gooey, and delicious.
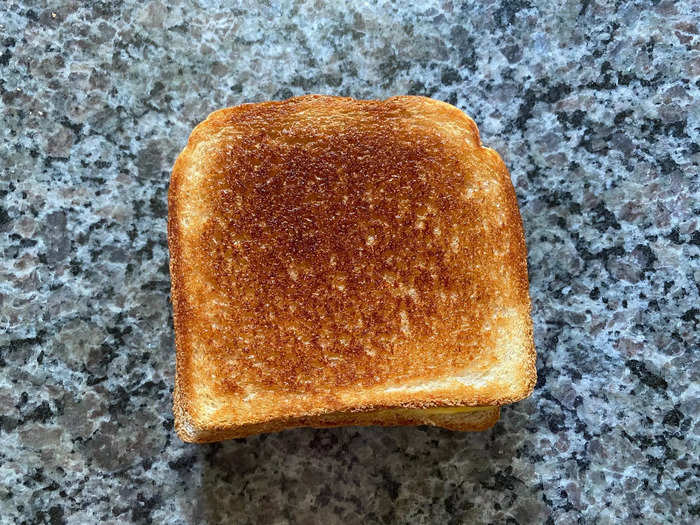
I had no doubts that this classic grilled cheese would be delicious, and I was right.
The outside was lightly crispy and the crust was a little chewy, but not tough. The inside was gooey and the cheese didn't burn at all.
The stove method was also ideal for getting a perfectly golden crust since I could easily check on the bread and adjust the heat quickly as needed.
Next I decided to test out making a grilled cheese in an oven.
I started by preheating the oven to 400 degrees Fahrenheit, which took about 15 minutes. This was already longer than it took to start and finish the grilled cheese on the stove.
I placed the sandwich on an enameled, cast-iron pan, hoping this would give the sandwich a good golden color without getting stuck.
Once the oven was preheated, I popped the sandwich in on the bottom rack.
The grilled cheese took about 11 minutes to make.
I checked on it after about five minutes and it was nearly ready, but not quite there.
I gave it another minute before flipping, then I set a five-minute timer to cook it on the other side.
I took it out when the bread looked a little darker than golden, and some of the exposed edges of the cheese were starting to burn.
The oven was trickier than the stove, but it still produced a yummy sandwich.
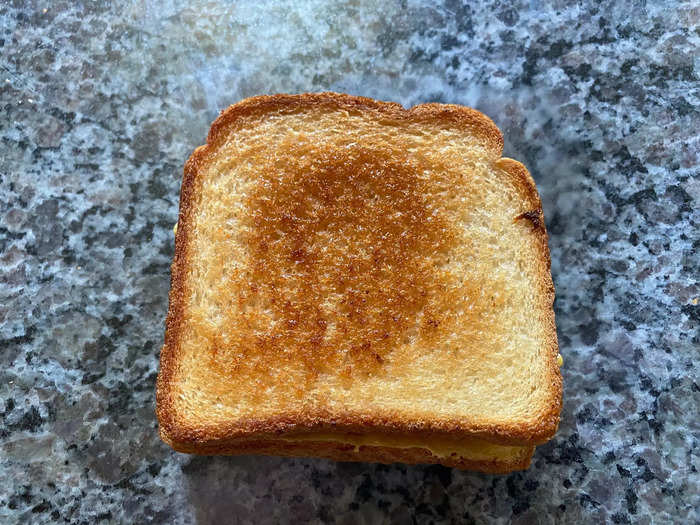
With the oven, I had to keep a close eye on the timer to avoid the sandwich from burning up. Still, this method produced a pretty good grilled cheese, although maybe not quite as delicious as the stove version.
I was impressed by how golden the outside of the bread turned out. It was very crispy and not too tough to chew.
The inside was cheesy, but not as gooey as my first grilled cheese. The bites without the burnt cheese were best.
I had the highest hopes for the air-fried grilled cheese.
I don't have an air fryer (I usually use a convection setting on my toaster oven for similar results). But I always see recipes online for delicious-looking foods made in the countertop appliance, so I was excited to try out a grilled cheese in a borrowed air fryer.
I expected it to come out with a cheesy, gooey interior and a light, crispy exterior.
I started by setting the temperature to 380 F. Once it was preheated, I popped the prepared sandwich inside and let it cook for four minutes.
When I opened the basket, I was put off by what I saw.

The top slice of bread was sliding off, exposing more of the cheese, which looked burnt and ballooned up, almost like plastic.
The bread wasn't overdone, though, so I flipped it over and decided to keep cooking it and see what happened. I turned the temperature down slightly to 370 F and cooked it for just two more minutes.
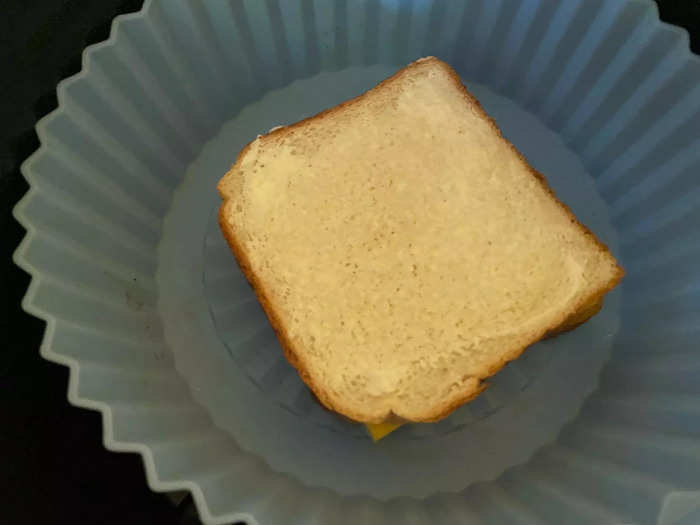
This grilled cheese had an OK flavor, but the texture was way off.
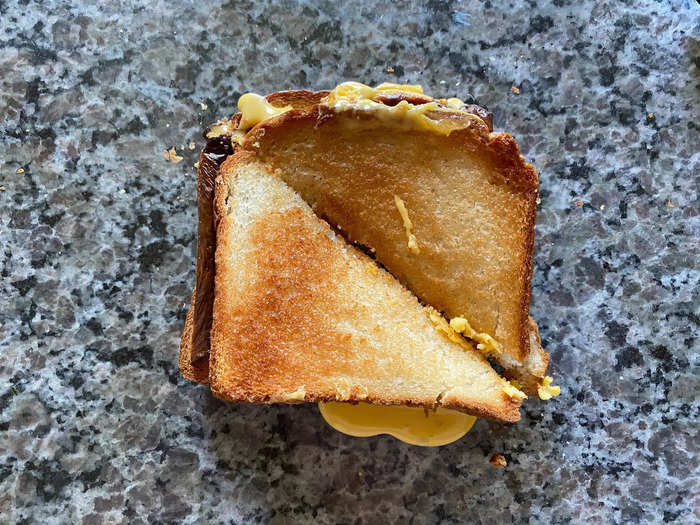
This sandwich was quick to make, but the way the cheese burned was unappealing.
The flavor was fine, minus the somewhat-burnt taste I found in some of the bites, but the texture was all wrong. The inside was slightly gooey, but the bread was tough and chewy, making it unpleasant to eat.
I'm not used to using an air fryer, so this could've been due to user error.
Overall, the stove method is still best, but I could see the oven being a great way to feed a crowd.
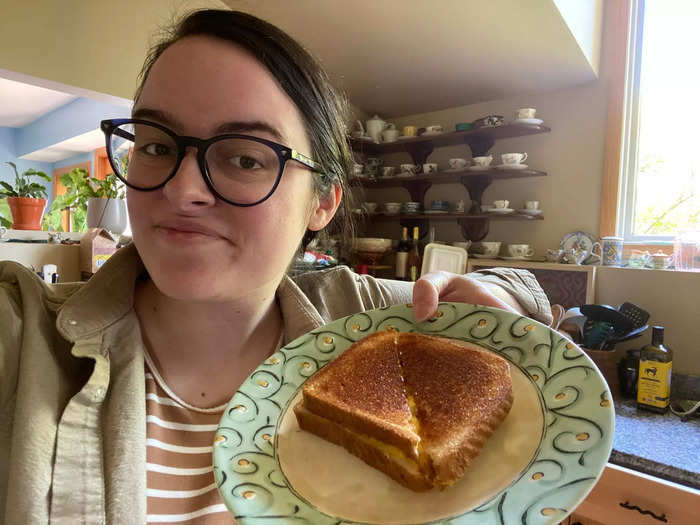
The stove method was the best. It was quick and delicious.
It took about the same amount of time as the air fryer, but the taste and texture were superior. Using the stove was also the easiest way to keep a close eye on the grilled cheese and adjust the temperature as needed.
I wouldn't make a grilled cheese in an air fryer again. The cheese was mostly burnt, and the bread was golden in some parts, too light in others, super chewy, and tough.
Although I preferred the stove, I wouldn't turn down another oven grilled cheese.
The texture and flavor were both pretty good. I probably wouldn't use it to make a single sandwich, but I think this appliance would be extremely convenient for making several grilled-cheese sandwiches at once to feed a crowd.
Popular Right Now
Advertisement