I asked a brow expert how to tint eyebrows at home — it's surprisingly easy if you follow these steps
Maria Del Russo

When you buy through our links, we may earn money from our affiliate partners. Learn more.
- Tinting your brows is a great way to help them appear fuller without having to fill them in with makeup every single day.
- We spoke to makeup artist and brow expert Bob Scott about how exactly to pull this technique off from the comfort of your own bathroom.
- It's actually surprisingly easy to tint your brows at home with RefectoCil dye ($10) and Liquid Oxidant developer ($17). The only other supplies you'll need are things you likely have at home already.
I've been getting my brows tinted for about four years — ever since I first met Bob Scott, brow extraordinaire. As someone who is constantly looking to cut down her morning routine, I liked the idea of tinting, since it would pretty much guarantee I didn't have to fill in my brows for about five weeks.
But with COVID-19 still making in-salon visits a distant memory, I started to miss Scott and our tinting sessions. So I gave them a call to see if it was possible to do the procedure at home. Turns out, tinting your brows from the comfort of your own bathroom isn't as difficult as you may think.
Who is brow tinting best for?According to Scott, pretty much anyone can tint their brows at home, and, if done right, see positive results from the process. "They'll see brows that appear denser, hairs that may look longer, or more hair present than they had noticed before. But the transformation is greater and more useful on brows that are naturally faint, or patchy brows that are being regrown." I tend to fall into the latter category, with brows that are super dark but have noticeable patchy spots.
How to pick the right colorIf you're unsure about what color to pick up, and you go to a hair colorist, it's a good idea to reach out to them. They'll be able to guide you on a complimentary color to your hair hue. But if you don't, it's always a good idea to err on the side of lighter, says Scott. "Reversing dark brows is very tough and requires bleach," they explained. And unlike your brow pomade, tint takes five to six weeks to fade, depending on your skincare products and your sun exposure.
The first time I tinted my brows, I actually ordered a color that looked a shade lighter than my natural hair color, which I was worried about. But I just left it on for a minute longer, which wound up being perfect. So don't fret if your color looks a little light the first time you put it on.
Tips and tricksTo prep for your tinting, all you need is clean, moisturized skin. "Dry skin tends to stain more, and though staining is a normal effect of tinting and does wash away in the shower, some people want to avoid staining entirely," Scott says. "A light oil around the brows — but not on the hairs — would be sufficient to keep the skin protected. But there are tint removers that you can apply to the skin under and around the brow before and after tinting that won't get in the way of the color being deposited."
When I tint my brows, I also like to keep cotton buds around to clean up any stray color that may fall outside the boundary of where I want the pigment to deposit. These Muji buds are super precise, so they just pick up the amount of color that I want to erase.
Scott also recommends having all of your tools on hand and ready to go before you start tinting, just in case anything goes awry. I like to pre-moisten a few cotton pads in a shampoo/water mixture, so I'm ready to wipe off the tint when it's done developing.
Finally, it's important to remember that you won't really see the true color your brows have taken on until they're dry. So if you think you want to go darker, give them a little blast with a hairdryer first before you reapply your tint.
Tools you'll need- Brow tint (Scott loves RefectoCil because it's gentle on sensitive skin and affordable at under $10)
- Developer, like RefectoCil's Liquid Oxidant ($17)
- A fine-tipped synthetic paintbrush or angled makeup brush to push the mixture into the brow
- A small vessel, like a shot glass, to mix your pigment and developer
- Cotton buds to clean up any stray color
- Cotton pads
- A shampoo/water mixture to clean the tint off
Steps 1 and 2: Brush your brows with a spoolie brush to ensure all of the hairs are going in their natural direction. Then, mix the tint and the developer in a small container, like a shot glass.
The tint and developer packages will provide the right measurements for you, but they differ based on brand.
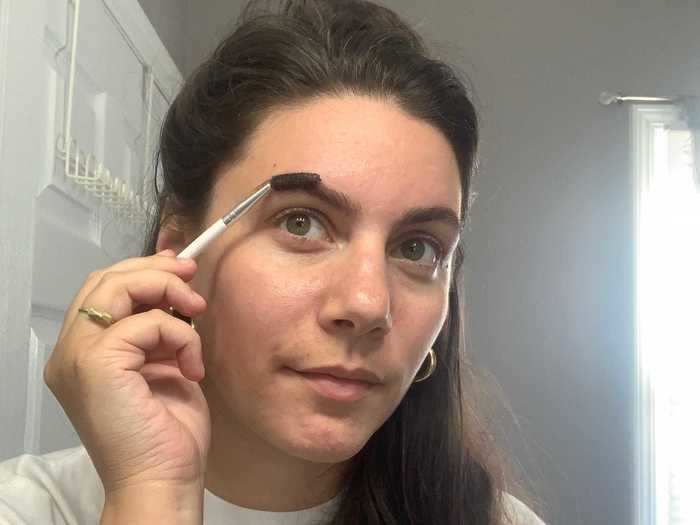
Step 3: Using your paintbrush, apply the tint only to the shape of the brow you have or will want to have after tinting. Use a cotton bud to clean up the shape.
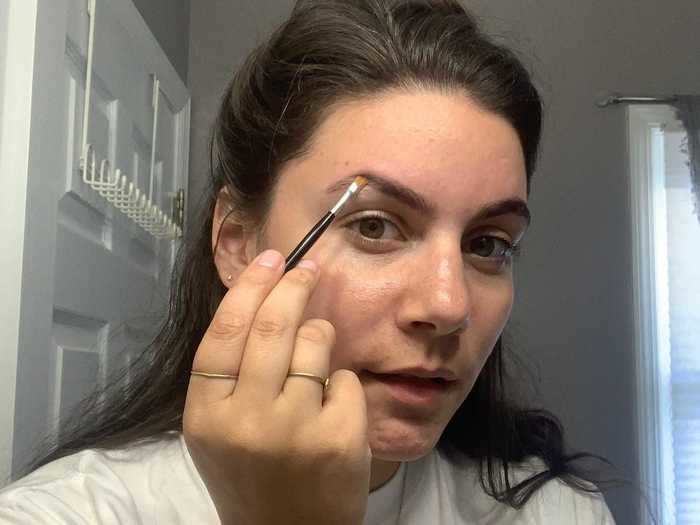
Step 4: Wait four or five minutes — or however long the instructions say. You can check the color by using a cotton bud to push a little of the tint and developer mixture aside to see how it's developing.

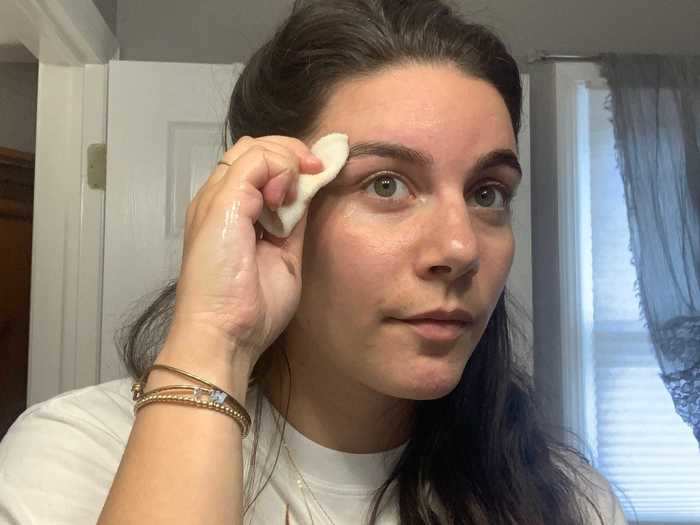
Step 5: After five minutes, soak a cotton pad with your shampoo and water mixture, and wipe the dye off your brows to stop the color developing.
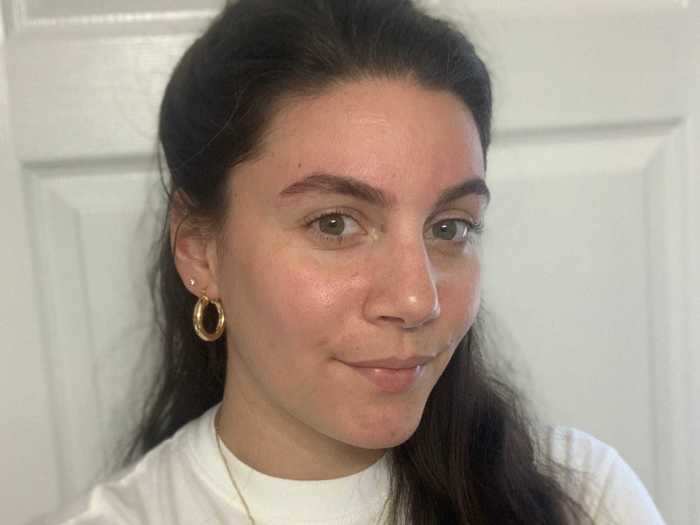
Step 6: Allow your brows to dry completely so that you can see the true result of the tint. If you want to go darker, you can repeat the process either over the entire shape or in spots where the hair is still faint.
READ MORE ARTICLES ON
Popular Right Now
Popular Keywords
Advertisement